Modern Vim Setup (Neovim 5 base configuration with LSP client)
Categories: Dev

In this article, I will start from scratch with Neovim, building a base configuration that can later be extended. The goals:
- Flexibility/failsafe
- Configure in such a way that Vim, not just Neovim, will work with the same configuration
- Add necessary workarounds so that the same configuration works not only on Unix-like systems (Linux, Mac), but also Windows
- Make sure that basic health checks pass
- Make sure that Python is working with Neovim, both Python 2 and Python 3
- Make sure that Node.js is working with Neovim
- Make sure that Ruby is working with Neovim
- Implement a plugin management system
- Prepare a language server interface for future extensibility
Installing Neovim
In order to use the LSP (Language Server Protocol) client that is built into the latest Neovim, we need Neovim 5.
At the time of this writing, Neovim 5 was still in pre-release, so to install it, one needs to use the nightly versions.
You can download and install the latest pre-release from Neovim’s Releases page on Github.
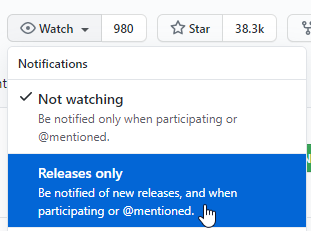
I recommend you subscribe to the release updates on Github, so that you can be notified when an upgrade is available:
Install with package managers
If you want to keep Neovim more easily up to date, your package manager may have an entry for Neovim nightly.
On Windows, use Scoop, make sure that the “versions” bucket is enabled with scoop bucket add versions then run scoop install neovim-nightly.
On Mac, install homebrew if you haven’t already, then brew install --HEAD neovim.
On Linux, your distro may or may not have options for installing the nightly. If using Ubuntu, you may add the Neovim Unstable PPA.
On my beloved Fedora, I have not found a Neovim nightly copr that has Neovim 5. So, I download the appimage from the Releases page, then symlink it into my path with something like ln -s path/to/appimage ~/bin/nvim.
Verify installation
When you enter nvim -v, does the output start with NVIM v0.5.0? Success.
Create the configuration file(s)
Neovim may have slightly different configuration file locations, depending on the platform. Before we proceed, determine which directory should contain the init.vim file. To do this, launch nvim and then type :echo stdpath('config') or, if you prefer to stay in your terminal:
nvim --headless --cmd "echo stdpath('config') | q"The result will probably be ~/.config/nvim/ or some variation of that. On Windows, it may be ~\AppData\Local\nvim\.
On platforms that do not use
~/.config/nvim/(i.e. Windows), I find it more convenient to standardize, so that I know what to expect no matter what system I am on. To do so, I set the environment variableXDG_CONFIG_HOMEto$HOME/.config. On Windows, that generally means opening the Start Menu, starting to type then selecting “Edit environment variables for your account”, then making a newXDG_CONFIG_HOMEvariable with a value of%USERPROFILE\.config. It wouldn’t hurt tomkdir ~/.configin Powershell (or create the folder with another preferred method).
Whatever the path, remember it. The rest of this article will assume the configuration path is ~/.config/nvim/ and the Neovim configuration file is therefore ~/.config/nvim/init.vim.
If the configuration directory (assuming ~/.config/nvim) does not exist yet, create it now.
Play well with Vim

If you have no intention of ever using Vim, this step can be skipped. In this case,
~/.config/nvim/init.vimis the configuration file to use, period. No need for the below steps. If you go this route, in the remainder of this article, you can use~/.config/nvim/init.viminstead of~/.vimrc.
If you are like me and want to occasionally fallback to Vim, then it may make sense create an init.vim that essentially points to ~/.vimrc so there is one point of configuration. That does mean that our .vimrc may need to have some conditional logic. In other words, it will need to consider “Am I Vim or Neovim right now?” and configure itself accordingly. For me, that is acceptable and modest inconvenience, unlike dealing with two configuration files.
The following contents in ~/.config/nvim/init.vim will cause it to load ~/.vimrc every time Neovim is launched:
set runtimepath^=~/.vim runtimepath+=~/.vim/after
let &packpath = &runtimepath
source ~/.vimrc
Feel free to download a gist of the above.